KICK DOWN JACKS:
6000# KICK DOWN JACK- A short hose is attached to the jack at the factory. The hose is clamped to the pivot bracket. It can be moved to the opposite side of the jack if necessary to avoid heat sources or other obstacles.
9000# KICK DOWN JACK – When connecting the hose to the jack, the hose should go in the upper left-hand corner, over the pivot area and down the front of the jack. After connect- ing the hose to the fitting, the hose should be clamped with a 1/4" bolt to the left side of the pivot bracket. Be sure the hose is snug against the jack in the retracted (horizontal) position.
16000# KICK DOWN JACK – Route the hose around the left pivot, then across the back side of the cylinder and connect to the actuator fitting. Attach the hose to the pivot bracket using a hose clamp. There should be no slack in the hose.
STRAIGHT ACTING JACKS :
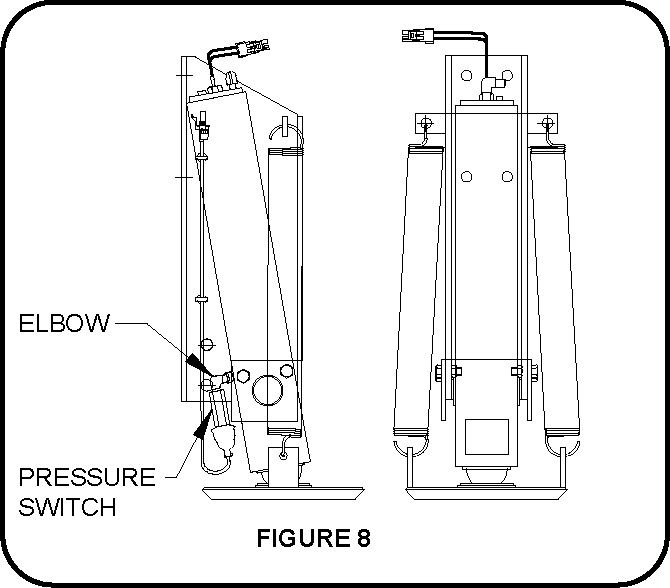
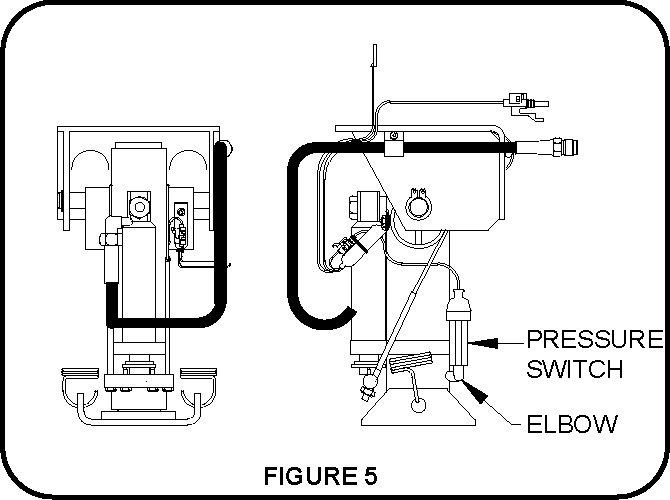
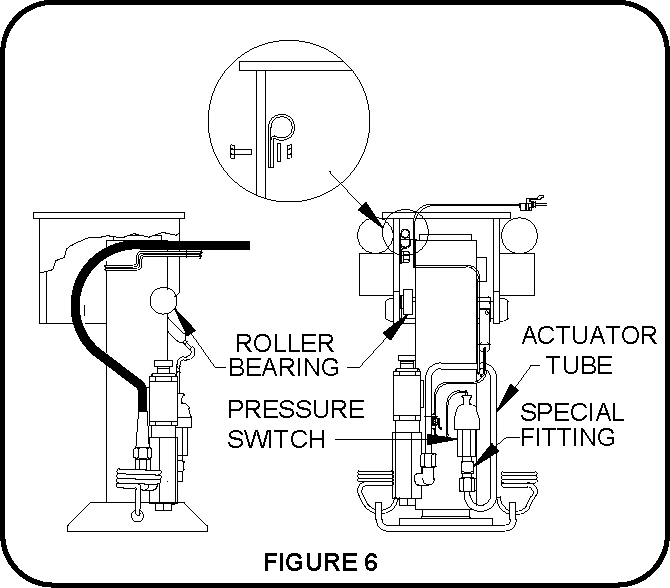
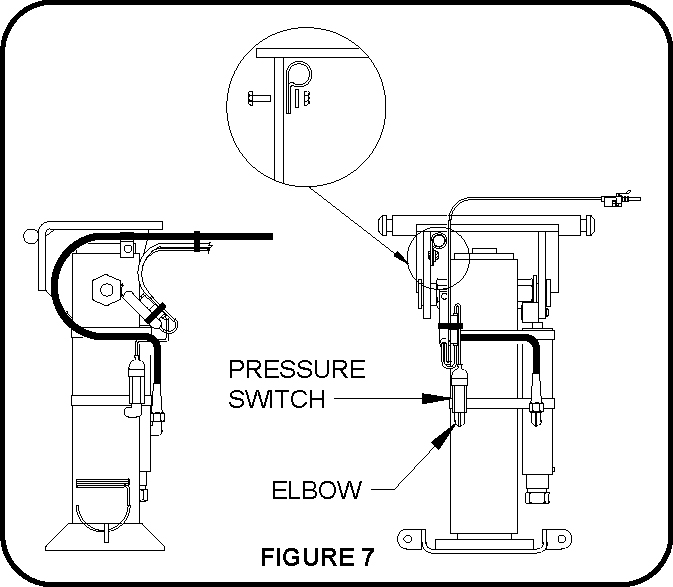
5. PRESSURE SWITCHES: All automatic, computerized systems require a pressure switch on each jack. In most cases the pressure switch will need to be installed on the jack. It may be easier to install the switch before mounting the jack. Refer to FIGURES 5,6,7, & 8 for proper pressure switch locations.
On the 6000# and 16000# kick down jacks and straight acting jacks there is a plug that needs to be removed. Then install the elbow and pressure switch as shown. Be sure to use Teflon tape on all pipe threads.
On 9000# kick down jacks, remove the actuator line. Then remove the existing elbow. Install the special fitting and pressure switch as shown. Then reinstall the actuator tube. Be sure to use teflon tape on all pipe threads.