WARNING:
USE CAUTION WHEN REMOVING OR REPLACING SPRINGS UNDER TENSION. PINCHING OR SEVERE INJURY CAN OCCUR IF SPRING TENSION IS RELEASED UNEXPECTEDLY OR SPRING IS NOT PROPERLY HOOKED TO SPRING MOUNTING TABS/BRACKETS.
It is recommended to read the complete instruction sheet before proceeding to the videos or starting spring removal or installation.
For spring removal and replacement we recommend the use of wood shims. A 1¼" X 7″ shim that can be purchased at any home improvement store works well. Other types of shims are available but the wood works best.
Spring Removal – HOW TO REMOVE JACK SPRINGS (VIDEO)
Extend the jack until the spring coils are separated. Kick-Down jacks need to be extended some after swinging to the vertical position. Insert shims between as many coils as possible. Add shims to both sides of the spring to keep the spring straight.
Put the system in the STORE mode (Paddle Switch/Touch Panel Controlled Systems) or manually open the solenoid valve, move the jack control lever (For Lever Operated Manual Systems) to the retract position. Use a small jack or bar to force the cylinder back up until the springs are loose and can be removed. Kick-Down jacks will have to be forced up to the horizontal position then tied up in place.
Note: Older computer-controlled systems with hex shaped solenoid valves will not have a manual valve release. The system will have a drain valve located near the manifold to relieve pressure on the jacks. Make sure to drain the oil into a pan and check fluid level when the repair is complete.
If the existing springs are to be reused, leave the shims between the coils so the spring can be re-installed.
Spring Installation. HOW TO INSTALL JACK SPRINGS (VIDEO – has no audio)
IMPORTANT: If the foot is not fastened to the cylinder, the foot and springs can slide off the cylinder if not properly seated before the cylinder is extended too far. This can cause a problem with the installation.
When installing new springs, use the HWH spring installation tool, TS63136. Refer to the video link for instructions on installing springs
(link to video of spring installation.)
Refer to information below to use the manual valve release to extend and retract the jack.
(Skip to Valve Insert)
Make sure all jack and room (if so equipped) manual valve releases are in the closed position.
Use the manual valve release to operate the jack having springs replaced. Open only the valve for that jack. Use link below for Jack Valve locations.
(link to MP643917)
IMPORTANT: If the instructions direct you to extend the jack, the manual valve release MUST BE IN THE CLOSED position before releasing the Pump Run Switch or the Up Arrow button. If the pump shuts off before closing the manual valve release, the jack will retract with the springs attached.
Use the pump run switch on the power unit assembly (if so equipped) to run the pump and extend the jack when so directed. Use link below for PUMP RUN SWITCH information.
(link to MP349895)
If the power unit is not equipped with a pump run switch, use the jack touch pad to operate the pump and extend the jack when so directed. First, unplug all jack solenoid valves. Be sure to mark the valves and harness plugs to insure proper operation after reconnecting the plugs to the valves. Use link below for jack valve connection information.
(link to MP843230)
If replacing a front jack spring, use the front up arrow button (jack extend) to operate the pump to complete the repair. If replacing a rear jack spring, use the rear up arrow button (jack extend) to operate the pump to complete the repair. Use link below for Touch Panel information.
(link to MP243151)
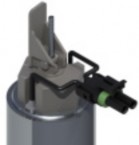
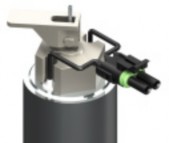
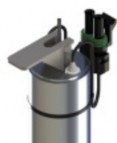
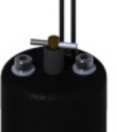 LARGE VALVES – 2.25" Diameter. May have a T-Handle Release, 1/4" Nut Release, or a Cam Release.